Showing posts with label recipes. Show all posts
;
Showing posts with label recipes. Show all posts

eat: frozen fruit salad

If you follow along on instagram you might know that I started whole30 and ended up sticking with it for over 100 days.  When life got a little crazy I kind of fell off the wagon and immediately noticed how horrible I felt.  My body really doesn't do well with dairy or grains and although I love sugar I really needed to cut down on it.  I've been trying to find things that still taste good and are actually good for me and fruit salads are a definite favorite!


This fruit salad is so easy to make and even easier to enjoy!  I don't have exact measurements because really I just wing it- but I'll break down my usual for this how-to:

Slice-
1 banana
4 large strawberries
12 blueberries

Sprinkle-
shaved coconut
cashew pieces

Pour-
coconut milk

Mix it all together and freeze for about 15-20min, if I'm feeling crazy I will add a dash of cinnamon.  This is my favorite treat right now and I love that I don't feel guilty afterwards, enjoy!

make: apple crumble

I don't eat warm apple desserts very often, the texture always gets to me, but there is something about an apple crumple that I can't pass up.  This recipe is a mix of a few I found online so there isn't a way to link to an exact original as I changed up some of the ingredients to better suit what I usually cook with.


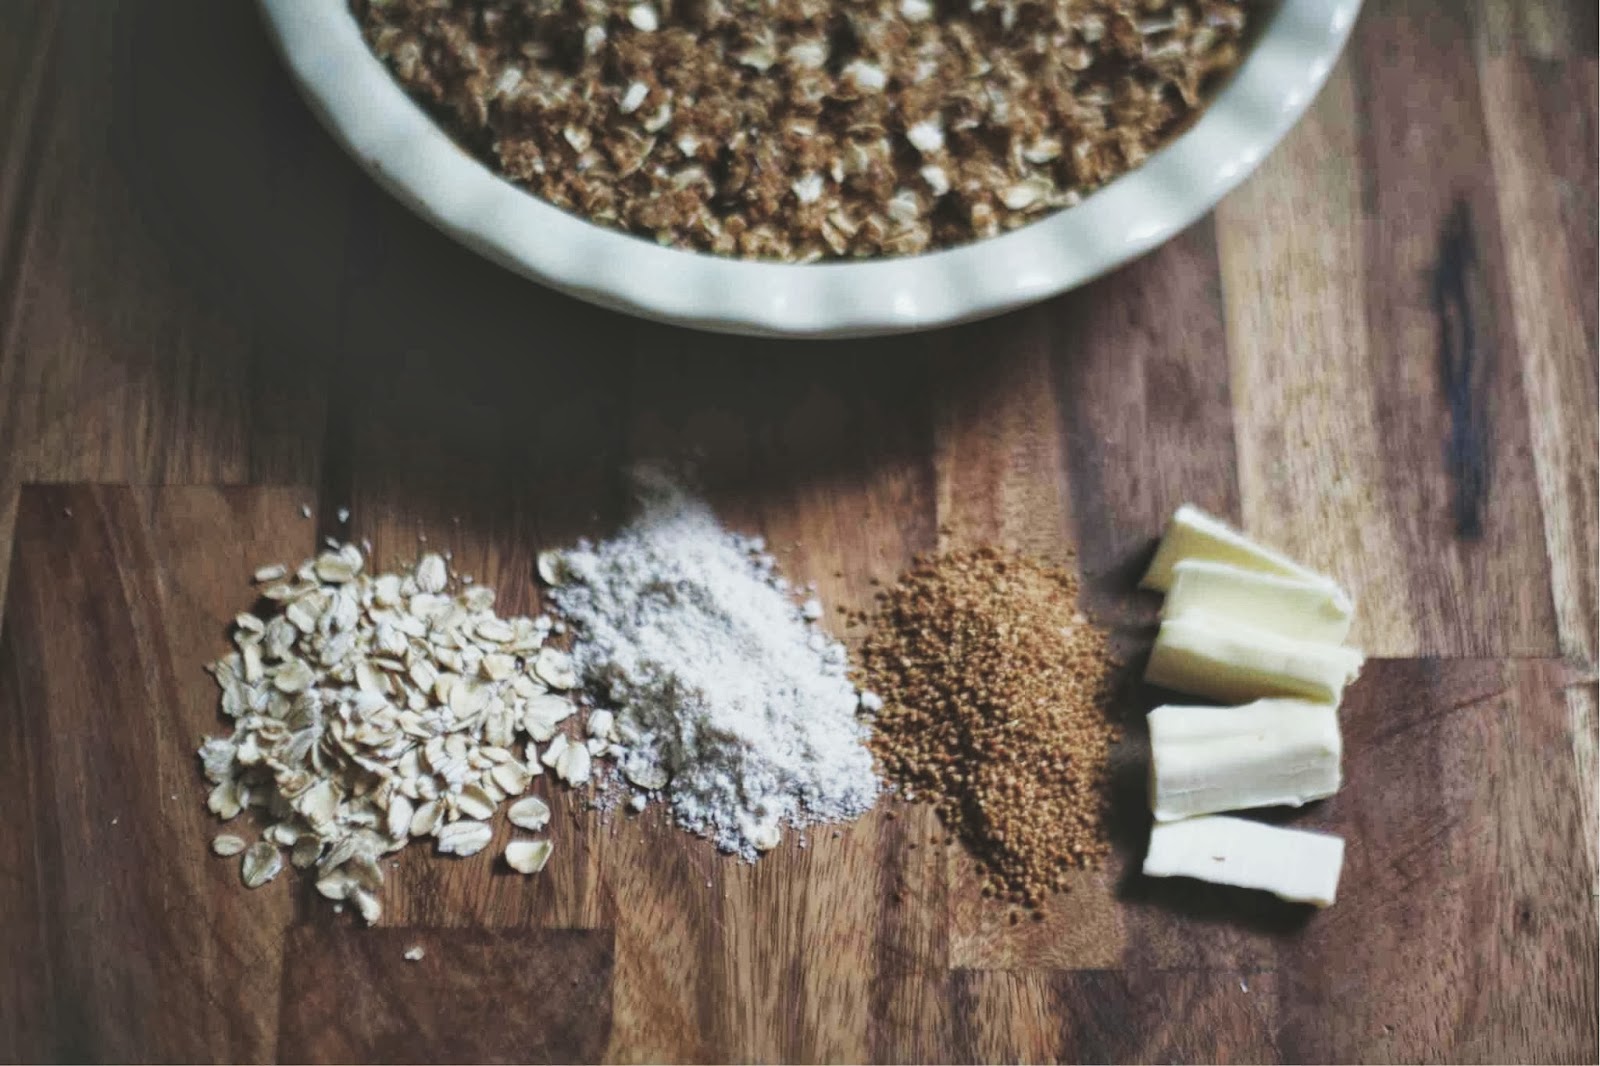
You can easily substitute out the sugars or flour for any kind you like, but I'm going to share with you what I used.  In place of refined white sugar I used coconut sugar and I switched out white flour for a 1:1 mix of rice & almond flour that I always have on hand pre-made, for my brown sugar I use sucanat (dried sugar cane juice aka organic brown sugar) and for butter I use earth balance baking sticks.

note: none of the links above are sneaky affiliate links, they are links to the direct product 
websites to share what the ingredients are if you have never heard or seen them before. xo

Apple Mix Ingredients:
4-5 cups of sliced apples for a 9" round (adjust as needed for the size of your dish)
1 1/4 tsp cinnamon
1/2 cup of coconut sugar
1/4 cup warm water

Crumble Mix Ingredients:
1 1/4 cups of oats
7 tbsp of butter (cut into pieces)
3/4 cup of brown sugar
3/4 cup of almond/rice flour mix


Preheat your oven to 350 degrees.  Peel and slice up your apples and place in your baking dish.  Pour sugar, cinnamon and water over the apples and lightly toss to coat them all.  Set aside.

In a separate bowl mix your oats, flour, brown sugar and butter until all the butter is mixed in.  You can mix with a whisk, fork, mixer or pastry cutter, but I used my hands and it worked like a charm!  After your mix is ready add it to the top of your apples completely covering it. For some variety if you like crunch add in some nuts or even pre-made granola.  Pop it into the oven for  40-45min or until the topping is a golden brown.  Let cool just enough to still be warm and enjoy alone or with a scoop of your favorite vanilla ice cream! 


If you try this version, I'd love to know how it turned out! Enjoy xo

make: pumpkin moon pies

Although it has been in the 90's here in Southern Oregon, I can't stop dreaming of Fall!  I think if I share some of my favorites for autumn maybe it will get here faster. dang-it please get here faster.  Luckily Carly is hanging out sharing a yummy little recipe to help my fall-loving-self get in the mood!

Carly writes over at Lipgloss & Crayons. She is an elementary school teacher, a newlywed, a Christian, and a fashion lover. On her blog you will find crafts, recipes, beauty tips, and fashion obsessions plus a little info about her life in the City of Angels.


I love this time of year, when the weather starts to cool and the leaves start to change.  I love scarves, boots, and pumpkins.  My absolute favorite fall recipes are ALL pumpkin based, and I'm sharing one that I discovered last year.  Pumpkin Moon Pies! These were such a hit at each party I brought them to, that I ended up making them six or seven times in three months.  Lucky for you all, I experimented a bit and perfected the recipe!  This recipe is based on a post I had bookmarked from the amazing Brown Eyed Baker, with a few adjustments of my own!


Preheat the oven to 350 degrees, and prepare a cookie sheet with cooking spray or parchment paper.

Ingredients: Flour, cinnamon, baking powder, baking soda,sea salt, ginger, nutmeg, sugar, brown sugar, vegetable oil, canned pumpkin, eggs, vanilla, cream cheese, powdered sugar, butter, maple syrup

Cake: 

In a large bowl mix together:
3 cups all-purpose flour
2 tablespoons cinnamon
1 teaspoon baking powder
1 teaspoon baking soda
1 teaspoon salt
1 teaspoon ground ginger
1 teaspoon ground nutmeg
Set aside.

In a separate bowl, mix together:
1 cup granulated sugar
1 cup dark brown sugar
1 cup canola or vegetable oil

Add and mix:
3 cups chilled pumpkin puree (canned pumpkin)

Add and mix:
2 eggs
1 1/2 teaspoon vanilla extract

Add the flour mixure in two parts, and whisk until combined.

Use a large spoon to drop a small ball of dough onto a greased cookie sheet or moon pie tray (1 inch apart).

Bake for 10 to 12 minutes, until a fork can pierce each cake and exit cleanly.

Frosting:

In a larger bowl, blend:
4 ounces unsalted butter until smooth
Add and blend:
8 ounces cream cheese

Gradually add and blend:
3 cups of powdered sugar

Add and blend:
3 - 4 tablespoons maple syrup
1 1/2 teaspoon vanilla extract

 Frost half of the cooled pies, and top with a plain pie.

 Enjoy!

Carly @ Lipgloss & Crayons

The Cook Book: Doggy Treats


Hey all you love.ly readers!  I hope you're all enjoying your summer.  Today's recipe is a little different - because it's for all those sweet dogs in our lives. It is actually less of a recipe and more of a "throw a few things together because dogs eat almost anything" kind of post.

I have one dog that would likely eat cardboard if I dipped it in peanut butter and another dog who is rather picky {and too smart to eat cardboard}.  They both love doggie ice cream but it's a little pricey and god knows what is in it, so I came up with a simple ice cream recipe that my two little loves can enjoy after a hot summer afternoon walk.

Sweet Potato Peanut Butter Doggie Ice Cream 
{makes four servings ~ double or tripple for more}

-one giant sweet potato - peeled and cut into large pieces
-1/2 cup all natural creamy peanut butter {no sugar added}
-about 1 cup of chicken or beef broth
-small plastic containers {1/2 cup size} or small paper cups

1. Boil the sweet potatoes until they are fork tender {or you can microwave them}.
2. Once the sweet potatoes are tender, drain out the water and mash them with a large spoon.
3. Mix in the peanut butter and chicken broth.  The mixture will look like an un-appetizing mush, but no worries, your dogs will love it!


4. Spoon equal amounts into small plastic containers or small paper cups and let them sit out {uncovered} until the mixture cools {about 30 minutes}.  Once the cups are cool to the touch, cover {with lids or plastic wrap} and freeze for a few hours up to several weeks.


Optional - take a thousand pictures of your dogs as they enjoy their frozen treats!
{Wait, that's just me who takes unreasonably large amounts of dog photos on a daily basis....?}


Gordita and Finn are clearly big ice cream fans ~ enjoy!


french vanilla cappuccino COOL WHIP


Thank you COOL WHIP for sponsoring this post. Join us on Facebook for inspiration and recipes for everyday treats. What you add makes it. #coolwhipmoms
Now that the warmer months are upon us (at least some of us yeah?) its a perfect time to stay cool with something that tastes great.  A favorite around here is using COOL WHIP Whipped Topping and mixing it with different ingredients. It basically makes the most amazing mousse you will ever have!

I'm not going to lie, not only does it taste great.. but its insanely easy to make.  To me this means a no fuss dessert, not to many ingredients and since it tastes great its sure to be a crown pleaser. If you want just keep how easy it is to yourself and no one will no better =)

Whats great about a recipe like this is that you can add in practically anything you want like fruit juice, honey, chopped fruit.. you name it!

Today I want to share one that requires just two things- COOL WHIP & cappuccino drink mix.
Depending on how much you want to make just put your COOL WHIP into a mixing bowl and by taste start sprinkling in the cappuccino mix. When we make this we use an entire container of COOL WHIP then a couple of scoops of the mix and go from there.  Its easy because you can place it all back into the container it comes in to save it for another time... thats if you don't down it all in one sitting =)

Stir. Stir. Stir and then place that bowl of yummy in the freezer for just a bit.
When you are ready to serve add a garnish of sprinkled coffee grounds for a great look and obviously some added flavor!  If you are a lover of cold desserts and vanilla or coffee flavors this will become your new best friend.  No baking, no cooking.. barely any clean up- a dessert lovers dream.

Whats great is COOL WHIP comes in a few varieties including original, fat free and sugar free.  This treat is great alone or added to coffees, pie and other desserts.  Enjoy!
If you get a chance make sure to stop by the COOL WHIP website which shares recipes that are such a great reference when you are in need of a tasty treat... what are some of the ways you love to use COOL WHIP?

Do you have a special dessert you'd like to share? 
Enter COOL WHIP's Fan Dessert of the Month Contest for a chance to win $500! 
Simply make a COOL WHIP dessert, take a photo, and upload it here. Enter now!

Make sure you stay up to date with COOL WHIP by following them

-------------------------------------------------------------------------

Sponsored posts are purely editorial content that we are pleased to have presented by a participating sponsor. Advertisers do not produce the content. 
I was compensated for this post as a member of Clever Girls Collective, but the content is all my own.

The Cook Book: Cold Thai Noodle Salad


Cookbook contributor Gina Morrison of Acute Designs is stopping by today to share a health-tasty recipe with us.  Be sure to check out her eat & drink blog: Taste.

Cold Thai Noodle Salad


As you may or may not know...the lovely Heather recently changed her eating habits and eliminated gluten and dairy.  It must really make her feel good because life without cheese sounds like torture to me :).

Heather asked me for a few gluten/dairy free recipes and the first thing that came to mind was this cold Thai noodle salad I made a few weeks ago.

The only thing in the recipe that contains gluten is soy sauce, so if you are eating a gluten free diet, Heather suggests you use Braggs Amino Acids as a soy sauce substitute.

If you have a lot of people to feed, make the entire recipe. If not, I would suggest halving it. It is cheap and healthy and *oh* so tasty.  Feel free to add in more or different veggies.  Or chicken if that's your thing.  I just used what had in my fridge.


Cold Thai Noodle Salad {serves about 8}

-1/3 cup of soy sauce {or Braggs Amino Acids if you are a gluten-free eater}
-1/3 cup on all natural peanut butter {zap in the microwave for about 30 seconds to soften it}
-2 tablespoons of honey
-1 tablespoon of sesame seeds
-2 tablespoon fresh minced ginger
-1 teaspoon garlic powder
-1/3 cup rice wine vinegar
-juice from two-three limes

-1 bell pepper, diced
-1 small package of sugar snap peas {about 2 cups}
-green onions, diced {about 1/3 cup}
-1 cucumber, diced

-6 servings worth of rice noodles

-a big handful of chopped, fresh cilantro

Cook the noodles and put in a large bowl with the chopped veggies.  In a smaller bowl, mix together the sauce {everything from soy sauce through lime juice}.  Pour the sauce over the noodles and veggies and toss all until well coated. Top with the fresh cilantro.  Eat immediately or refrigerate for later.


Enjoy!
This dish is a great "make ahead" lunch or dinner.  
I made a batch on a Monday and then it for lunch every day that week.
xo,
Gina


caffeine please! (plus other non-coffee things)

Last month I participated in a secret blogger gift exchange, where a bunch of bloggers all submit some info on things they like then are hooked up with some others to exchange gifts with. I sent some items off to Jacinta and received some items from Christie.  A couple of the things I mentioned I liked were coffee, candles & wine- big shocker huh?


I received this really great book called I love coffee! (which I really do) so when I discovered that this book included 100 easy recipes I was all about it! Today I want to share with you a super yummy one that you can easily substitute some of the ingredients in- which I needed to do for the dairy stuff.  In the warm months I'm a fan of the iced or blended drinks so this one is right up my caffeine loving alley.


I've only been able to try one recipe so far and because I'm still learning how to substitute things out, it has been interesting to see if I can still have yummy treats.  The verdict is in- yes I can.  Here is the recipe along with my substitutions below each ingredient!

GOOD FOR YOU HEALTHY CAPPUCCINO
(found on page 130 of the book)

2 (6oz) containers fat free cappuccino yogurt
-i used nogurt in chocolate-

1 cup fat free milk
-i used almond milk-

2 cups low-fat mocha or coffee ice cream
-i used 2 cups lactose free vanilla, 1 tbsp dry coffee grounds & 1/4 cup brewed coffee-

cocoa powder for garnish
ground Cinnamon for garnish

1) place all ingredients in the blender, blend until smooth (add ice if desired)
2) pour in glasses & chill if desired
3) add whip cream or garnishes if desired
4) drink up!


The next gift was great because Christie combined my love for two things that I can make into something pretty- wine & candles.  She sent over this really cool wine candelabra (the top part shown in the photo above),  basically you take the metal part and place it on any empty wine bottle to have!  Its so interesting, and I think will be great to put outdoors for dinner parties with some citronella's in it so the bugs don't mess with us. Cute and functional!

If you like the items I just shared they are both available on amazon here & here.  Thanks again Danielle for hosting the giveaway and Christie for sending over the goodies. xo


The Cook Book: lemon blueberry cupcakes


One morning I was browsing through my reader and came across these amazing looking cupcakes, I love mint and I love chocolate so I was sold. So I sent over a quick note to Michelle and without hesitation she totally was up for a little recipe sharing and today I'm letting her take over!


Hi! I'm Michelle from Little Blue FeathersI am so excited to be sharing an amazing dessert recipe with you today.  I have a bit of a sweet tooth and am always on the hunt for a new recipe and sweet treat to cure the craving.  Today I am going to walk you through the recipe to make these beautiful pastel cupcakes that will be perfect for your next spring get together!

Photobucket
Ingredients:

:frosting:
1 cup unsalted butter (2 sticks) slightly softened
3 - 4 cups powdered sugar
1/4 teaspoon salt
1 tablespoon pure vanilla extract
1/4 cup of blueberries
*adjust the measurements according to the texture and taste you like.  
:cake:
2 1/4 cup cake flour (cake flour will create a more light and fluffy cake)
1 tablespoon baking powder
1/2 teaspoon salt
1 1/4 cup buttermilk
4 large egg whites
1 1/2 cups sugar
lemon zest from two lemons
1 stick (8 tablespoons) of unsalted butter, slightly softened
1 teaspoon pure vanilla extract
1/2 teaspoon pure lemon extract

To make the cake:
Preheat the oven to 350 degrees F and add paper or foil liners to your cupcake pan.

Photobucket
1.) Mix together the cake flour, salt and baking powder in a medium bowl.

2.) In a different medium bowl, mix together the buttermilk and egg whites. 3.) In your large mixing bowl (bowl #3) mix the sugar and lemon zest with your hands until the sugar is fragrant and mixed evenly with the lemon zest.

Photobucket
Photobucket
Photobucket
Photobucket
4.)  You should now have 3 bowls.  In the sugar and lemon zest mixing bowl, beat in the butter and mix on medium speed for about 3 minutes.  While the mixer is still on medium speed, add the vanilla and lemon extract.

Photobucket
5.) You are now ready to combine everything in to one bowl.  Add half of the flour mixture slowly.

Photobucket
6.)  Next, add half of the milk mixture.  Repeat steps 5 & 6 until everything is combined.  Beat on medium speed for 2 minutes to mix everything really well.


Photobucket
7.)  You are now ready to fill your liners!  I use an ice cream scoop because I do not have a small ladle.


Photobucket
8.)  Bake for 17- 19 minutes at 350 degrees.  You will know the cupcakes are done when you insert a toothpick in the center and it comes out clean. *While the cupcakes are baking, start preparing your frosting!


Photobucket
To make the frosting:  
  • Puree 1/4 cup of blueberries in a food processor.  Set aside.
  • Beat the butter in a mixing bowl on medium speed.  
  • Turn mixer on low speed and slowly add in 3 cups of powdered sugar and mix until the sugar has been incorporated completely.  
  • Increase the mixer speed to medium and add in the vanilla extract and salt.  Mix well.  
  • Next, slowly add in the blueberry puree while mixing on a low-medium speed.  If you notice the frosting is getting to thin, add more powdered sugar.  If you feel the frosting is too thick, add more blueberry puree or heavy milk.
*While cupcakes are baking, prepare the frosting and place in the refrigerator until the cupcakes are completely cooled off.  This will make the frosting easier to pipe on the cupcakes.

Photobucket PhotobucketYou are now ready to bake your own homemade lemon blueberry cupcakes from scratch!  Enjoy <3

The Cook Book: gluten-free vegan scones


Hey there! I'm Ashley from Sugar Mama Bakeshop. I recently had an amazing conversation with Heather about the crazy effects of diet on our health... specifically she told me about her awesome experience with cutting out gluten and dairy.
Well, she was preaching to the choir :)


I've been gluten & dairy free for 4 years now and I've made it my mission to create fabulous sweet treat alternatives.
I really do believe that you can enjoy delicious desserts and pastries and still feel great about what you're putting into your body!

And to prove it I'm sharing one of my favorite recipes.

Photobucket

I was never really that into scones.
But then I got a request for gluten free scones so I gave them a whirl and holy cow!
They're so good.

These are so great for breakfast because they're low sugar and since scones are a little on the dryer side they go perfectly with a big ol' cup of coffee!

Photobucket

These bad boys are quick and easy. Plus you can mix it up. We love them with chocolate chips and/or blueberries. (Word to the wise: freeze your blueberries for at least half an hour before mixing to avoid purple scones...unless you're into that kind of thing.)

Chocolate Chip Scones
(printable version here)

Photobucket

Ingredients:
  • 1 TBSP flax meal
  • 3 TBSP hot water
  • 1/2 cup plain coconut milk (or soy)
  • 1 tsp lemon juice
  • 2 cups flour**
  • 1 tsp xanthan gum
  • 2 tsp baking powder
  • 1/4 tsp baking soda
  • 1/2 tsp sea salt
  • 1/3 cup brown sugar
  • 1 stick vegan butter (I love Earth Balance)
  • 1/2 tsp pure vanilla
  • 1/2 tsp almond extract
  • 1 cup chocolate chips, blueberries or any other fruit!

**For the flour in this recipe I used 1/2 cup each of:
  • whole grain brown rice flour
  • whole grain sorghum flour
  • tapioca starch
  • potato starch


Instructions:

Prep a cookie sheet with parchment paper and preheat over to 425.  In a small bowl mix together flax meal & water. Let mixture set at least 5 minutes and stir "goop" together until well blended. (This is your "egg".) In a glass liquid measuring cup combine milk & lemon juice. (This acts as a "buttermilk".) Set aside. In a medium bowl whisk together: flour, xanthan gum, baking powder, baking soda, sea salt, and brown sugar. Cut butter into chunks and add to the dry mixture. Cut in with knives or a pastry blender tool until crumbly. Add 1 cup of mini chocolate chips to the dry mixture. (Or wait and add blueberries or other fruit at the end.)  Add flax "egg" into mixture above. Then add "buttermilk" mixture. Finally add vanilla & almond and mix until just binding together. Sprinkle rice or sorghum flour onto countertop. Place dough on top and knead a few times (5 or 6 times). Pat into a round shape (like a really big thick pancake). Cut into 8 pie shaped pieces. Place on cookie sheet, brush tops lightly with milk and bake in 425 degree over for 13 –15 minutes. Cool for a couple minutes on the pan & then on wire rack.


Enjoy!